A Dog House for my Tender

Among all the big things I have been making with 3D printing there are also the odd small parts and I had a request a little while ago for a dog house.  Now as much as I am a fan of our four-legged friends sadly this is not a building for them!  The name ‘Dog House’ in railroad terminology refers to a small shelter on top of the tender for the brakeman; this dates back to the days of roof walks and cabooses.  With freight trains getting longer the brakes on the locomotive and caboose rapidly became insufficient to stop the trains so it was the brakeman’s job to go up and down the roof walks and apply the brakes on the individual cars.  The brakemen usually traveled in the caboose but often it was necessary to station a man at the head of the train. Space on the locomotive footplate was limited.  This led to the Dog Houses being added on top of the tender, facing towards the back of the train.  From this small building the brakeman had shelter from the elements and he could see what was happening with the cars and his fellow roof walkers. As far as I know only men did this job?

Several railroads used Dog Houses made from a variety of materials; the first Dog House I am going to 3D print will be based on a steel plate structure as used by the Norfolk & Western on their huge Y6B articulated steamers.

Dog House 1

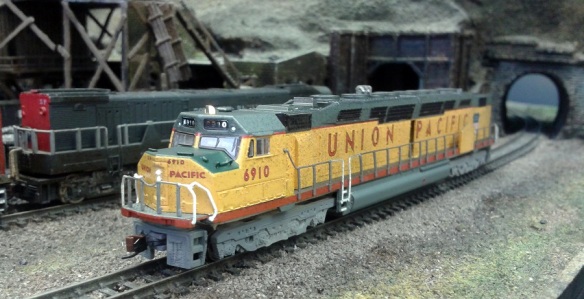
Yes, I know this is a Sierra Railroad locomotive and I know they never had a Y6B, but I like it!

I had a request for a steel Dog House to replace a damaged one from a Rowa Y6B, the same model as shown above.  As I have a model of this locomotive it was a simple case of measuring the original and reproducing it as a 3D model; the trick is to get the detail large enough to print but not too big that it looks out of scale.  As shown below the structure is hollow, not only to reduce the cost, but also to make it realistic.  The thinnest part is the center bar between the windows, but it is just on the limit of what is printable for the FUD material, so it should be okay.

N&W Dog House

Once printed the Dog House spent the night in a jar of Goo Gone followed by a wash-off in warm soapy water. This removes the residue from the print processes, please see my FAQ section for more information. After cleaning it was ready to be painted and added to a model.

Steel Dog House 1 Steel Dog House 2

As my Y6B already has a Dog House this particular one is now a spare but I always test print all my designs before I make them available to buy.

Steel Dog House 3 Steel Dog House 4

You can get the Dog Houses here.

I also plan on doing a timber Dog House and that will be in a later post.

Completing the Dummy Chassis for a Bachmann EMD DDA40X

The test print for the Bachmann EMD DDA40X has arrived so in this post I will show you how it worked out and what we did with it.

This print was made from Shapeways’ White Strong & Flexible material (WS&F) and this was the first time I’d used it.  The finish was a little rough out of the box but the overall definition was good, as shown below.

DDA40X Dummy Chassis 1

It is, as the name suggests, strong and it holds its shape perfectly.  Given that the chassis  will be mostly covered up the roughness is not a concern, although it could easily be smoothed with a quick wipe with sand paper.

The chassis has been designed to work with the fuel tank which comes with the DDA40X. The fuel tank clips onto the chassis using the same fixing lugs that are on Bachmann’s power chassis.  Below is an image of the tank clipped onto the chassis; what it doesn’t show is that the lip on the chassis that fits inside the tank is little bit too big and needed to be filed down.  This has been fixed in the 3D model.

DDA40X Dummy Chassis 2

Bob, who does the painting and assembling, wanted to add power to the model as the DCC circuit board was still in the shell which also controls the top and tail lights and the flashing light on top.  Because this is a test print, and because I haven’t drawn the correct ones yet, we are using dummy trucks designed for an EMD DD35 model.  These work with 4 Fox Vally 36″ metal wheel sets (FVM3611) each.

The trucks are printed in the Shapeways FUD material as they are highly detailed.  Bob sprayed them with a base gray and then added power pickups using thin copper strip.  The strips where soldered to the ends of bolts to be used instead of the bolster pins as pictured below.

DDA40X Dummy Trucks 2

DDA40X Dummy Trucks 1

The strips pick up power from all axles on each truck.  The washer was added to the first photo above because the chassis sat a little too low and rubbed on the side of the trucks.  An extra down stand has now been added to the chassis 3D model to accommodate this.

The shell needed a little modification as well.  Power wires have been added to the circuit board with washers so they can be connected to the bolts which attach the trucks.

DD40AX Shell 2

The central corridor has also been completed.  Because the Bachmann chassis fills the whole shell, Bachmann did not add the side walls to the corridor, but when the shell is fitted to my dummy chassis there would be a big void viewable through the doorway.  Bob used plastic strips to complete the corridor.  He painted the inside of the walls black and the corridor Armor yellow to match the shell.

DD40AX Shell 3

With all the parts assembled it became apparent that the overall model was too light so Bob added some extra weight inside the fuel tank as pictured below.

DD40AX Shell 4

Here is the model on the track powered up. It runs freely and is perfect for a second unit or mid train helper.

DD40AX Dummy 2

As this was the first time using the WS&F material I’m keen to try it on another project. It is rougher than the FUD and has a little less definition, but its strength and cost effectiveness will lend itself to projects which, if made using the FUD, would be unrealistically overpriced. Obviously body shells etc that require the detail will have to be done in FUD but with 3D printing any range of parts for the layout can be produced, and new materials are always being made available so watch this space!

Once I have drawn up the DDA40X dummy trucks I will make the kit available through my Shapeways site.


A Dummy Chassis For a Bachmann EMD DDA40X

The problem with kit bashing is the spare parts left lying around afterwards! With the new Bachmann DDA40X chassis being used for my 3D printed DD35 models, Bob, who does the painting and assembling, realized he was starting to get a lot of spare, brand new DDA40X shells lying around and he came up with a great idea.  Why not print a dummy chassis and trucks to use with the spare shells? They can be used as dummy locomotives or even mid train helpers.

The DD35 locomotive shell was designed to fit directly onto the DDA40X chassis, after it was shortened by 24mm, and the DD35 dummy locomotive uses exactly the same shell.  So the theory is to take the DD35 chassis and lengthen it by 24mm which should make it into a DDA40X dummy chassis. The main differences would be the fuel tank and the ends of the new chassis. The DD35 dummy chassis, pictured below, has the fuel tanks permanently attached as part of the print and the ends are shaped to match the DD35 shell.

EMD DD35 Chassis Kit

The DDA40X fuel tank was much longer then the DD35’s and was all one piece as opposed to being made from a pair of GP35 tanks.  Bachmann made the DDA40X fuel tank out of a strong plastic with a metal insert which added weight to the locomotive.  It was a removable item which clipped onto the underside of the metal chassis.  After lengthening the new chassis I roughly modeled in the DD40AX fuel tank and positioned it as shown below.

DDA40X Chassis & Fuel Tank

I added lugs which would drop down and line up with the fixing holes in the fuel tank, so when printed the real tank will clip on in the same way as it did to the metal Bachmann chassis.  The cross bar in the middle is designed to give some rigidity to the large opening but I made sure it was above the metal insert.  The ends of the chassis didn’t need to be as long as I originally intended because, as pictured below, the Bachmann shell changes shape at the ends, and the flat surface which sits on the chassis is interrupted by the lugs circled in red.  This also repeats at the other end even though there is no cab.

DDA40X Shell 1

I decided to stop the new chassis at the lugs and, because the couplings are a part of the truck assembly, any more material used past the lugs would be redundant and only add to the cost.

As there is no detail on this chassis, because the original fuel tank is being reused, it didn’t make sense to print this in the FUD material as it would be more expensive, therefore this chassis will be made from Shapeways’ White Strong & Flexible (WS&F) material.  This is my first print using this material and it has some different design criteria; mainly that the minimum thickness of material is higher. However, even with thicker walls, the cost works out a lot cheaper than if printed in FUD.

The final design for the new chassis looks like this.

DDA40X Chassis

The test print will be printed in the WS&F material along with some DD35 dummy trucks in the FUD material.  Although these trucks technically are not correct for this locomotive it will be a good test to check the chassis.  The plan is to draw up some DDA40X trucks to be made available with this chassis by revising the DD35 truck design.

Next time I will show you how the WS&F material came out and the process of finishing the model.

N-Trak Convention 2014 Bournemouth UK.

This weekend the N-Trak convention was held in Bournemouth, UK, and I wanted to share with you the layouts and some of the fantastic modeling on display.  The Black Diamonds also had several modules from their large modular collection which formed a large double main line setup as well as the N-track layout.

For those wondering what N-track is, here is brief description;  N-Trak is one of several modular N scale model railroad standards which allows people to connect their model railroads together.  The standards refer to things such as layout height, module length and width, track spacing and power connections.  The basics for N-Trak state that a module should be 2 foot deep and 3 foot long and there must be 3 tracks running through the module, spaced at 1.5-inch (38 mm) centers at the front. The rest of the module is up to you. (The full standards and specification can be found on the N-Trak website here)  This allows many modules to be connected together forming a big railroad, making it easy to run very long trains.  At each end or joining the two ends will be a large staging yard with trains ready to run over the whole layout.  Sometimes the layout may consist of a few modules or sometimes, well, more than I can count!

Anyway, the setup here in Bournemouth was not a mammoth affair but a nice size layout along with the Black Diamonds layout.

Here is the yard at the back of the N-track layout.

N-Trak Con 2014 Bournemouth - N-Trak Yard

You can see the three mainlines running into the yards at the bottom of the picture, each line has its own yard, the tea and sandwich are an optional extra!

The main section of the layout featured an industrial area with plenty of buildings and track work which swept nicely through the scene. Once again you can see the three mainlines running into the modules at the bottom of this photo.

N-Trak Con 2014 Bournemouth - Main Moduels

Here are a good range of close up photos of the N-Trak layout.

N-Trak Con 2014 Bournemouth - Main Moduels 1 N-Trak Con 2014 Bournemouth - Main Moduels 2 N-Trak Con 2014 Bournemouth - Main Moduels 3 N-Trak Con 2014 Bournemouth - Main Moduels 4 N-Trak Con 2014 Bournemouth - Main Moduels 5 N-Trak Con 2014 Bournemouth - Main Moduels 6 N-Trak Con 2014 Bournemouth - Main Moduels 7 N-Trak Con 2014 Bournemouth - Main Moduels 8 N-Trak Con 2014 Bournemouth - Main Moduels 9 N-Trak Con 2014 Bournemouth - Main Moduels 10 N-Trak Con 2014 Bournemouth - Main Moduels 11 N-Trak Con 2014 Bournemouth - Main Moduels 12

If you’re wondering where all the trains are, unfortunately I’m not the greatest photographer in the world and all my photos of moving trains are blurry!  However I do have some videos.  Here is a double-headed steam freight running though town.

And an ATSF freight.

For me, the highlight of the show was this.

N-Trak Con 2014 Bournemouth - Pennsylvania Centipede 1

It’s a brass Pennsylvania Baldwin Locomotive Works DR 12-8-3000 “Centipede” custom made by N-Stars who were at the show running their trains.

N-Trak Con 2014 Bournemouth - Pennsylvania Centipede 2 N-Trak Con 2014 Bournemouth - Pennsylvania Centipede 3 N-Trak Con 2014 Bournemouth - Pennsylvania Centipede 4 N-Trak Con 2014 Bournemouth - Pennsylvania Centipede 5

N-stars specialize in very high quality mechanisms and chassis for N scale locomotives.  This Centipede is fitted with a LokSound sound decoder which really brought the engines to life, even over the chatter in the room. Here’s a video of the Centipede in action.

Hans from N-Stars told me that the Centipede will navigate a 9″1/2 radius curve which is amazing given the length and amount of wheels under the locomotive.

Here is another video of one of Hans’ locomotives.  It’s an old Bachmann 2-8-0; these are notorious for being bad runners but as you can see below Hans has fixed that.

He has removed the Bachmann motor and fitted a brand new custom motor into the tender, which looks like an ex-Rivarossi 0-8-0 tender to me. The new motor powers the locomotive via a drive shift between the tender and locomotive with the drive shaft almost imperceptible.  The locomotive ran superbly.

Here is long SP train of trailer trucks running through town with a little help from the NS providing a second locomotive.

N-Trak Con 2014 Bournemouth - SP Freight

The Black Diamonds layout, setup opposite the N-Trak, had a longer run and bigger yards at each end, which led to some very nice long trains running throughout the railroad.  In the photo below is one of the yards with a long coal train waiting to depart headed by three diesels.

N-Trak Con 2014 Bournemouth - BD Yard

Sadly due to a poor camera battery I wasn’t able to get many photos of the Black Diamonds layout but I did get some videos earlier in the day.  Here is a Milwaukee freight ruining past the mountain.

And a Metra commuter train.

And a long Pennsylvania freight headed by Q2.

The Q2 is another N-Stars improved locomotive. It still has it’s original motor but the power pickup and tender to locomotive connection has been updated greatly improving the performance.

N-Trak Con 2014 Bournemouth - Pennsylvania Q2 4-4-6-4 2

There were also several other very interesting locomotives on this layout including a Con-Cor Galloping Goose.

N-Trak Con 2014 Bournemouth - Goose

And a pair of LNER pacific, a little out of place being British, but to me they are beautiful and so it’s always good to see them.

N-Trak Con 2014 Bournemouth - LNER

And finally before I left the show Hans wanted to show me the Pennsylvania 4-8-2.

IMAG0597

As well as being a fantastic looking locomotive Hans also fitted a Soundtraxx Tunami sound decoder, and it sounded superb.  Here is a video of it running, and again, even over the noise of the room, you can here the beat of the exhaust as the engine heads away from the camera.

After the day at the N-Trak convention in Bournemouth  I came away eager to produce some new prints.  Later on this year I will be working on a new project with N-Stars which will hopefully make the New York Central fans happy, but as to what will be, you will have to wait for a later post.

Painting the Pre-Rebuilt/Ex Gas Turbine UP Water Tenders

The test print of the Pre-Rebuilt/Ex Gas Turbine UP Water Tender has arrived from Shapeways and in this post I will show you what it looks like and what happens next.  This usually follows the pattern of an inspection, a clean and a touch of color.

Here is how it looks when it arrived, all I have done is taken the parts out of the bags Shapeways ship them in and washed them in a warm soapy water.

UP Ex Turbine Tender 1

As you can see the parts are almost transparent and very glossy because there is still a lot of waxy residue left on them.  The part at the bottom tight of the photo is a not actually from this kit, it’s a replacement pilot for and N scale Atlas 2-8-2 that I am working on, this I will tell you about in another post.

Overall the details appear to have come out very well as yo can see from the photo below showing pipe work on the end beam.

UP Ex Turbine Tender 4

The small loose small parts also printed well, the trucks and bolster pins are from my other UP Water Tender so I knew they would. The ladders are different in this kit and again I tried too make them as small as I could, the ring is to keep them together until you are ready to start modeling.  They are still over sized but as we are working at 1:160 scale sometimes sacrifices have to be made.

UP Ex Turbine Tender 3

The next step is to put the parts into Goo Gone and leave them for 24 hours.  I use and old pasta sauce screw top jar, this is ideal as I don’t have to completely fill it with Goo Gone and it stays sealed, the Goo Gone evaporators quickly.  I use just enough so that once the parts are in and the jar is laid on it side they are completely covered.

After the 24 hour soak the parts are removed and again washed in warm soapy water.  They are then left to dry for a further 24 hours.  In this time the remaining waxy residue ‘fuzzes up’ and becomes powdery on the surface of the model.  This I remove with an old tooth brush.

Once that is done the model looks like the photos below.

UP Ex Turbine Tender 5

UP Ex Turbine Tender 6UP Ex Turbine Tender 7UP Ex Turbine Tender 8

I am now able to see all the detail and it has all printed well.  These shots still show fuzzy build up on the ends that needs to be brushed off.

As it turns out I think I didn’t leave this particular model in the Goo Gone for long enough.  My current jar of Goo Gone has now been used for a lot of models and I think its potency is waning.  Please note, leaving FUD models in Goo Gone, or any other rubber solvent, for too long will make the materiel go soft and start to bend, eventually it will do unrepairable damage.  It is best to stick with the 24 Hour rule, and if that is not enough re-soak for only a few hours at a time until you are happy with the result.

Again for painting I handed the model over to Bob Norris and he went to work.  He started by spraying the whole body with Sea Grey acrylic by Hombrol which also acted as a primer for the yellow as shown below.

UP Ex Turbine Tender 9 UP Ex Turbine Tender 11 UP Ex Turbine Tender 10

Again, I think the excess fuzziness on the ends is due to me not soaking the model for long enough in the Goo Gone.  However not to be beaten Bob used a pencil eraser on the ends which greatly reduce the fuzzy effect and smoothed out the flat areas. The sides of the body were already smooth right from the print stage.

The part of the print that I was most interested to see was the grill mesh on the top.  You may recall from my last post that this had been modeled in as a recessed detail rather than an actual grill. However with the first coat of paint the grill patten relay shows up well and I am very happy with the result as shown below.

UP Ex Turbine Tender 12

With the gray paint dry Bob added the yellow.  He used Armour Yellow from Badger and brush painted 4 coats as shown below.  The red strips are decals.

UP Gas Turbine Tender 3

For this model Bob used railings from a spare Atlas body shell for the grab rails.

UP Gas Turbine Tender 2

UP Gas Turbine Tender 1

The model still needs a few finishing touches such as a splash of silver in the head light lenses, a coat of matt dulcoat to seal everything in, couplings and weathering but we wanted to show you how we where progressing.

The idea for modeling this tender was for the excursion train but originally it would have been a tender for a UP 8500 Class Gas Turbine.  So rather than show it with a steam locomotive here we have the tender in it’s original job.

UP Gas Turbine Tender 4

UP Gas Turbine Tender 5

The paint color doesn’t match the Gas Turbine, this is because it was painted to match the Kato COLA passenger cars which have a deeper yellow.  When the car is totally finished we will get some more photos and possibly a video of it running with the Kato excursion train, but that will be for another post.