Going Uphill – Part 4

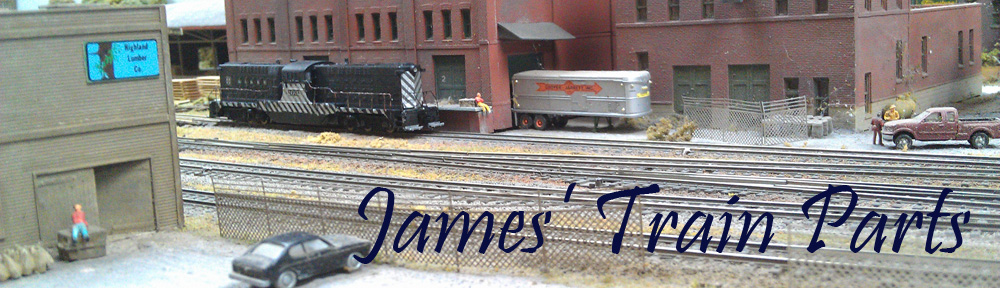
As promised this week I have some photos of my new Tehachapi Loop modules for our club layout ‘Solent Summit’.  As with all model railways, it’s not finished, but it runs and it’s just about ready for the exhibition coming up this weekend.

The main section is the loop itself, built on two 5′ by 2′ modular boards, which takes the line up by 2 and a half inches.  You can see the basic boards in an earlier post here.

Starting at the top and right-hand end, the line enters the module, and splits into two lines to form a passing place.  The signal is a Showcase Miniatures kit and does work, just not yet.  Also, the track joint to the next board is offset because the modules are not currently joined together and I didn’t spot that when taking the photo!

There are also two single signals for trains departing the loop.

The twin lines then run around the module and the descent starts just after they cross the tunnel.

The real loop is a lot larger and has some country roads and tracks leading into the center, but as this is compressed to make it modular, I’ve compromised with a path leading up to the cross on the hill.

The cross, at the real Tehachapi Loop, is a memorial to the men who died working the landscape to build the railroad.

The lines run around the hill through a rock cutting, which also helps disguise the module joints.

The lines continue to descend as they run around the back of the module.

In the view below you can see the lines drop from one side to the other.  The gradient is a steady 2.25% on the inner line and 2.1% on the outer.

Just before the lines converge into one, there are two more signals for the exiting trains, but as the lines are now in a cutting and on a bend, these signals are mounted on a gantry so they can be seen by the locomotive engineers from a distance.

The gantry is 3D printed; it’s a model by fellow Shapeways designer Ngineer and can be found here.

The signal heads are angled towards the back of the loop.

The shot below shows how the gantry signals are visible from around the bend.

The line then stops descending and enters the tunnel. From here the line remains flat as it leaves the module.

On the real Tehachapi Loop, the signal for the passing line is on the same side of the tunnel as the gantry, and the locomotive engineers can see it through the tunnel.  But as I’ve compressed the loop, and curved the line through the tunnel, I decided to put the signal on the other side. Anybody watching the layout will be able to see it once I have the signals working.

So there we have a version of the Tehachapi Loop on a modular N Scale layout.

I must admit as much as I like the module I’m not as happy with it as I had hoped for two reasons:

Firstly, I feel I’ve rushed it and I think the ballasting, rock work and scenery reflect this.  But the great thing about scenery, it can be built upon to refine and improve the level of detail. So once the next show is over I can take a bit of time to work on this.

Secondly is the hill in the middle.  The slope of the land formation from the top of the hill to the cutting by the gantry signal was supposed to be more gradual, but I realized I had no more room between modules when they were packed together for transport. One sits upside down on top of the other and the land at the center of the loop almost touches.  So the hill is designed to lift off which causes, I think, an unsightly joint.   But I think I can conceal this with some more careful scenery work to disguise the joint.  Again, the great thing about model railway scenery is it’s never final and can always be changed. I look forward to getting some inspiration and maybe some advice on how to solve this problem at the show next weekend.

But with these two points said, it runs well and I think the trains look fantastic on it.  And once the signals are all working I’ll be very happy.

It’s now only four days until these are set up with thirty-five other modules, not including the non-scenic yards, to form the ‘Solent Summit Railroad’ at the Warley National 2019 Exhibition.  If you’re coming this weekend I will see you there and if you can’t make it I will get lots of photos and videos of the layout to share with you, including a full walk-around video as I did at the NMRA (BR) Annual Convention in 2015 below, which was only 21 modules.

As it’s such a big layout and we have to pack up and drive back on Sunday night I don’t think I’ll have a post next Monday, but it will give me more time to write a  more in-depth post for the week after.

Going Uphill – Part 3

Over the last few months I’ve been busy working on customer layouts as well as getting my own layout ready for the Warley National 2019 Exhibition, which is in less than two weeks.  So I haven’t had a lot of time to work on the 3D printed projects, but that will pick up after the show.

You may recall, back in March, the Tehacipi Loop modules were fully working but rather bare.

Well, about a month or so ago it looked like this.  I admit I was starting to panic!

The base construction is a mixture of cardboard and blue foam offcuts packed with newspaper.

The newspaper worked very well in giving an uneven natural shape for the plaster cloth to follow but the downside is it absorbs all the moisture from the cloth, and in a cold workshop, stays wet.

I had to place the only available heater, an oil radiator, under the modules to help the plaster cloth to set.  I also found that using hot water to dip the plaster cloth into also helped it set quicker.  Well, it seemed to and working in the cold, my hands appreciated it!

Once the cloth had hardened sufficiently, which took a day or so, I separated the two modules and pulled out the newspaper, which was still damp.  The cloth then dried completely.

You can also see from the images above I’ve sprayed the track with a grimy color.  As I passed the spray can over the track I followed round with a cloth and wiped the tops of the rails.  The rails will need a really good clean once all the scenery is done but this helps a lot.

The next step was to add some ground color.  This is important as without it the white of the cloth will always find ways to show through. Just over a week ago the loop module looked like this.

I use either a green or brown undercoat which is just a cheap acrylic paint thinned with water.

Once dried the track was ballasted; you can see my pots of ballast ready to go on the corner of the module.  The rock outcrops have also been positioned, and colored, in the same way I did the trestle module, which you can read about here.

Over the last weekend this module, and the incline boards which go with it, have been totally transformed and now have all their scenery finished.  But I don’t have photos yet, you will have to wait until next Monday for that, as they were still drying when I left them.

The Warley National 2019 Exhibition is on the 22nd and 23rd of November 2019 at the NEC in Birmingham, UK.  You can read more about the show here.  We’ll be at stand number B53, almost in the middle of the hall! Along with my loop there’ll be 6 other new modules added to our layout, so plenty of new works to see.

And if you think the exhibition doesn’t look big, remember that our layout at stall B53 is 65′ by 26′.

Next week I’ll bring you some photos of the modules in their finished state. If you’re coming to Warley you’ll be able to see them in action, but I’ll endeavor to get some good video of trains tackling the loop to post here as well.

Alco C-855 N Scale ESU LokSound Install – Part 1

As well as being an iconic-looking locomotive the huge Alco C-855 also had an individual sound being powered by two Alco 16cyl 251C prime movers.  Together they developed 5,500 horse power and would’ve really rumbled as they passed by.  ESU have captured the right sounds and made them available for their V4.0 and new V5 LokSound decoders so in this post I’ll show you how I install sound into these locomotives.

Although the chassis has a step down section at the rear of the locomotive I wanted to add a good size speaker to ensure the sound has some bass to it.  The easiest solution is to cut a section out of the top chassis as you can see below.

Cutting the chassis just behind the inner screws leaves enough room for the speaker and provides a plastic shelf for it to sit on above the worm gear. The worm gear is below the top of the plastic so it won’t catch the speaker.  The chassis has already had parts cut out of the chassis making it lighter.  But given the sheer size of the locomotive, the fact that it pulls like a tractor anyway, and it will be running in a set of three, a little more removed will not be a problem.

The new Lokssound V5 micro sound decoder is a neat package and comes with a good 4 ohm speaker already attached and parts to assemble a speaker enclosure.  This chip came with an 8 pin plug, but as it will be hardwired in, the plug will be cut off.

Unlike the V4.0 Micro decoders which had different plugs soldered to the decoder all the V5 decoders are actually the same.  Below you can see copper pads on top of the chip.  This is actually a removable part with a Next18 socket underneath.  Next18 means it has 18 wire connections.

The chip looks like this.  The six copper solder pads next to the plug are for auxillary functions 5, 6 & 7 as well as stay alive connections.

The underside of the socket has no connections.

The flexible cable can be cut off leaving the socket section and copper solder pads.  The pads include track power positive & negative, motor positive & negative, speaker positive & negative, front & rear headlights, auxillary 1 & 2 and the common positive.

I will be mounting the decoder at the front of the locomotive behind the cab.  There are two ideal power fixing points to connect to.  Bridge wires will also need to be run to the corresponding screws at the rear of the chassis because the glue used to extend the chassis isolates the parts.  See the previous post about fitting a decoder to read more about this, which can be found here.

The original chassis came with a light bulb for the headlight which was attached to the screws via a contact plate.  But as this will need four connections, and I’ve lost the original plates, it’s easy to make some more.  For this I tend to use the excess solid core wire from a resistor, as shown below.

I wrap the wire around the screw.

Solder the ends together.

Cut off the rest of the wire and it’s ready to go.

The one screw which is sunken into the chassis, behind the one with the new contact, can’t be modified in the same way.  For this one I simply strip off enough insulation from the wire and wrap it around the screw twice.  Then as the screw is tightened down it grips the wire.  Make sure you wrap the wire clockwise so as the screw is tightened it doesn’t undo the wire.

With all the connections soldered to the pads the socket can be seated into the area behind the front screw.  But as the chassis is metal it will short out on all the solder pads, so cover the area with Kapton tape first.

The socket can then be put in place and the wires taped down.  Remember to set the wires in the middle of the chassis otherwise the shell will not seat properly.

One thing to note is the decoder will be sat directly above the screws which are delivering track power so the decoder should also be wrapped in Kapton tape, except for the Next18 plug.

The ESU speaker enclosure comes in four parts.  A base, two thin sections and one thick allowing different heights to be made.  Even with the chassis cut down one of the thin sections will need to be left out.  I use superglue to fix the enclosure together and to the speaker frame, ensuring not to get any on the actual speaker.

The assembled speaker can then be placed at the rear of the chassis with the wire connections at the top facing forwards.

The top of the speaker is just about in line with the top of the decoder which sits just under the roof line of the shell.

You may have also noticed the brown wires from the decoder socket were not quite long enough.  I could’ve replaced them but it was just as easy to extend them, covering the joint with heat shrink. If you’ve never worked with heat shrink before I did a ‘how-to’ on it which can be found here.

With the decoder plugged in the chassis is now ready for its trucks and then testing.  This particular chassis is for a C-855 B unit so I haven’t added any headlights, but both the C-855 A units will have lights, so I added wires from the socket and included a resistor which is tucked under the front of the decoder.  Below you can see all three chassis ready to be fitted to their respective shells.

The chassis have been tested and sound very good but installing the shells will add an extra level of resonance, increasing the volume. Once they are totally finished and fitted I’ll share a video with you so you can hear all six Alco 251C prime movers running.

EMD DD35 with Body Mount Couplers – Part 3

Back in January of 2019 I shared with you my test print for an EMD DD35 with body mounted couplers in N Scale.  You can find the post here.  This week I thought you’d like to see what it looks like with a bit of colour.

The shell, as pictured below, is stark white having been 3D printed in Shapeways’ Fine Detail Plastic, also know as FUD (Frosted Ultra Detail).

With the pilots 3D printed as part of the body, the only two parts are the main shell and the fuel tank.  This locomotive will be Southern Pacific 9900.

But, as with most SP locomotives this one won’t stay this clean for long as it’s going to be weathered.

Weathering can be done in many different ways, and to many different levels.  This locomotive will be weathered with enamel paints using an airbrush, and typical for the SP it will bit fairly grubby.

The locomotive will now need a good wheel clean to remove any paint, as it always gets on them, and then it’ll be ready to run.

The DD35 kit with body mounted couplers is available here.

Alco C-855 R-T-R Build – Part 13 – Handrails

This week I’m covering the next part of my step-by-step build of a set of N Scale A-B-A ready-to-run Alco C-855 locomotives.  You can find part one of the build here.  This step is all about adding the etched brass handrails and ladders.

The handrails on these locomotive run between the sand boxes which are fixed to the outside of the bodies. To make painting the sides of the shells easier the sand boxes are separate parts.  Each locomotive has eight sand boxes; four on each side.  The A units have two cranked sand boxes which fit behind the cab.  The other six are rectangular.  The B unit has eight identical rectangular sand boxes.

The red stripe was created with a decal and will be finished with paint.

Because both the shell and the sand box have been painted it may be a very tight fit, so you’ll certainly want to do a test fit before you attempt to glue them on.  On the rear of the sand box is a lug which fits into the slot on the side of the shell: if the sand box doesn’t fit it could be because of the paint around the lug and gentle scraping with a craft knife will remove this.

To fit the sand boxes I use a toothpick or similar to add a drop of superglue to the slot then press the sand box into place.

The sand boxes on the other side of the A unit are a mirror image.  (And yes the shell above is a different locomotive, number 61, to the one below, number 60).

The brass etch fret has six handrail sections to install as well as four ladders.

The center handrails, and the longest, have four posts which fit into the top of the sand boxes.  Both handrails are the same.

The sand boxes have square holes 3D printed in the tops to accept the handrails which not only makes it easier to get them in the right place but also makes them a lot stronger, as with the sun visor installation described in my previous post about detail parts.

However as the sand boxes have been painted it’s possible the square holes are blocked with paint.  If that’s the case they can be opened up with a 0.4mm drill in a pin vice as shown below.  No 3D printed material needs to be removed and a few twists should cut through any paint blocking the hole.

The handrail can then be test fitted.

As both ends of the handrail are fixed by the sand boxes you may find that the handrail bows which it has done in the image below.  This could be due to several reasons such as the sand boxes being slightly too close together or the 3D printed shell may have shrunk slightly which can happen if removed from the printer too quickly.  But it’s hardly noticeable except in the handrail. In this situation I remove the handrail, dab some superglue onto the four posts and fix them into the sand boxes.  Once the glue has set I use a pair of tweezers to increase the crank next to the sandbox which will stretch out the handrail and remove the bow.

The crank in the image above is rotated clockwise and the crank in the image below is rotated anticlockwise by the same amount.

Each of the eight posts in the center of the handrail can now be glued to the shell.  I do this by dabbing a small amount of superglue under the post with the toothpick and holding in place until set.  I tend to use a small flat blade watchmaker’s screwdriver to hold them down.  The posts or handrails for the ladders are not stuck down yet to allow correct positioning of the ladders.

The next sections to be fitted are the handrails behind the cabs; the B unit doesn’t have these.  There are two in the fret and they are both the same.

As with the center handrail this part has two posts which fit into the top of the front sandbox.  There is also a square notch in the side of the cab, level with the sun visor, which the end of the handrail fits into.  With the exception of the ladder handrail section this part is glued in place, again with small amounts of superglue dabbed on with a toothpick.

The last two section are for the rear of the locomotive.  Although both parts are the same shape they are different.  Below is the left-hand side handrail as viewed from the outside.

From the inside you can see two reduced sections which are bending points.  The first is just before the first crank on the left and the second is just before the second post from the left.

This section of railing fits into the top of the last sand box and the other three posts have square notches in the 3D printed shell to fit into.

The very end of the handrail fits inside the lifting lug and lines up with the short section of handrail that was fitted in my last post.

The front of the B unit has the similar handrails to the rear, the difference being they are slightly longer.  So if you test fit them and the posts don’t line up vertically with the notches you have the wrong end.

Now all of the handrails are installed I fit the shell to the chassis, remembering to locate the headlight and secure with some Black Tack as described in part 11 of this build.

I fit the shell to the chassis now because the next parts to be added are the ladders and these are probably the most delicate part of the model and will be protected, to some degree, by the chassis.

The ladders are all the same but on the rear are two reduced sections.  These are not bending points but rather locating points for the handrails.  In the image below the ladder on the right is showing the rear side.

To fit the ladders I dip the top in a spot of superglue and place onto the side of the shell.  There are two locating lugs 3D printed on the shell and the ladder sits on either side of them.

The handrails are then glued to the reduced section behind the ladder, but they can also be glued to the shell if you like.

There are a few other parts on the fret which were added to it not knowing if they were needed.  These are some Multiple Unit or MU hoses which could possibly be used on the pilots and two tiny pipes, L shaped, which were designed to go from the cylinder on the fuel tank to the pipe 3D printed on the shell.  But as the existing pilots have MU hose molded onto the original Con-Cor parts I’ve decided not to use them.  As for the tiny pipes; these would prevent the shell from being removed if installed and from experience they get knocked off so easily I’ve also decided to leave them off.  However they are there to be used if you wish.

As for the assembly of the A-B-A set, that’s now it.  I still need to do a little paint touch up.  I also want to add some blackening on the vents and grills and also the number boards need to be sorted out.  Next week I’ll have some proper photos and hopefully some video of the finished set but for now here are a few shots taken whilst their still on the work bench.

As I said, in next week’s post I’ll have some shots of the finished set to share with you.

Alco C-855 R-T-R Build – Part 12 – Detail Parts

This week I’m covering the next part of my step-by-step build of a set of N Scale A-B-A ready-to-run Alco C-855 locomotives, which are almost finished.  You can find part one of the build here.  This step is all about adding the last detail parts and putting it all together.

I will start with the fuel tank.  This screws to the underside of the chassis with the same screw which held the original Con-Cor fuel tank for the U50/Gas Turbine.

The new 3D printed chassis section is designed to accept the fuel tank in one direction only; there is a lug at the front and a hole at the back which lines up with the screw hole in the tank.

However it won’t fit without a little modification to the trucks.  The inner trucks have a bar and hook which the original fuel tank sat over.  This stopped the trucks from swinging out too far when you picked up the locomotive.  It had no effect on the running or tracking of the trucks.

But because the C-855 fuel tank is a different shape these hooks need to be cut off to allow it to fit properly.  In the image below you can see I’ve only cut off the vertical part of the hook as the horizontal section can still run into the C-855 fuel tank.  This will still help hold the truck place.  However, the truck can now swing out.  If you plan to leave the locomotive on a layout and not handle it much then this won’t be an issue but if you plan to regularly move the locomotive, for exhibiting at shows etc, the one option is to extend the horizontal section and I’ll show you this a bit later on.

The fuel tank simply fits on the metal motor chassis with the screw hole aligning with the hole in the plastic insert.  The insert was the piece which was fitted in part 4 of the build about the chassis assembly.

The insert is not threaded.  It could be threaded by using a thread cutting tool but as it’s plastic or rather acrylic and the screw is metal it will cut in with a little effort to get it started.

The fuel tank has two holes in the side which, when fitted, will align with two clips on the shell.  This holds the shell onto the chassis. ( I used a spare shell for the test fit as the painted one had just had its decals added).  To remove the shell simply spread the shell at the fuel tank and pull apart.

Earlier I spoke about lengthening the pegs on the trucks to stop them swinging out.  This can be done with anything you have eg. a strip of plastic or metal.  I used an off -cut from the etched fret border.  The left or front truck didn’t need to be extended but the rear did.  I simply superglued the brass to the existing peg.

With the fuel tank refitted the rear truck can no longer swing out.

Next we come to the crew.  These are modeled sat at the controls and include a platform with a grab handle on the underside for easy installation.

The two crew parts are designed with the engineer being offset to the middle of the locomotive.  The grab handle will be closest to the side of the shell.

Although I always spray my shells with a primer first, with these tiny details I simply paint them directly with paints using a small brush.  These areas are so small I don’t feel the primer will make much of a difference.  I tend to use Humbrol enamel paints as they are normally finer than acrylics and better for small details.  I know there can be an issue with using these paints on the 3D printed surfaces as they have been known to stay sticky for weeks but again for such small areas it appears to be okay.

I prefer the blue as a uniform color for my crew, it looks like denim and gives a traditional feel to the locomotive.

Inside the cab on either side are two shelves.  The crew parts will sit on top of these shelves.  The rear one has a step on top and this is the locating point to ensure the crew are put in the right place.

Using a pair of tweezers and holding the crew part upside down I test fit them first.  Sometimes if there’s some print residue on the shelf they can be a tight fit and the end of the crew platform part may need to be cut down ever so slightly.  I do this with the modeling knife.

Once I’m happy they’ll fit I dab the two ends of the crew platform with superglue and stick them in place.

The crew will now be visible through the windows.

The next details are from the etched metal fret.  To the right of the fret are two small grills.  These are walkways used at the rear of the locomotive.

I cut them out using a sharp knife.  In the close up below you can see two burrs on the left of the top walkway which will need to be trimmed so it’ll fit into the shell.  The walkways are handed, ie. they’re mirrored versions of each other, and the cranked face goes against the locomotive shell.

As always I do a test fit.  There are two notches for the walkway to drop into so the top is flush with the checker plate printed into the shell. After I’ve confirmed it fits I dab a spot of superglue on each end and place it back into the model.

It’s these small details like this that make the model come to life, but if I’d designed these to be a 3D printed part of the shell they would’ve been very chunky, if not solid.

The next detail from the fret is the long walkway which goes onto the roof over the center of the shell.  Again I cut it out with a knife and tidied up any burrs.

This walkway has a reduced section on each end which is designed to fit into a slot in the roof detail just past the large roof grill.  As the shell has been painted it is probable that this slot has some paint in it, as it does in the photo below, and will need to be carefully opened up with the knife. Take care that no shell material itself is cut away.

Test each end to see if the walkway slides in.  Once it does I spot, using a toothpick, a little superglue onto the areas where the walkway is supported, mainly the four raised strips, and a little on each of the reduced sections on the ends.  Then I fit the walkway.  Once one end is in it’ll need to be slightly bent, or curved, to get the other end in.  The walkway can be pushed down and it should stick to the four raised sections preventing the walkway from bowing back up where it was curved..

To the far right of the fret are two sunscreens for the cab.  These have tabs attached which fit into holes 3D printed in the cab sides.

The holes, above the windows, are already sloping up at the right angle so all you need to do, after a test fit, is dab some superglue onto the tabs and push them into place.

Again this is another detail which greatly improves the model.

The sun shades are not handed so either will fit on any side.

When I first started making etched sunscreens for my models, such as the DT6-6-2000, they were details which simply stuck to the sides and this made them weak.  Having the tabs running into the shell gives them lots of strength and helps prevent them being knocked off.

One of the smaller details is the rear hand railing.  The C-855B has one at the front as well.  This is a cranked section located in the middle of the fret.

It fits between the two lifting lugs at the rear (And at the front on the C-855B)

Believe it or not this is one of the most fiddly details to add!  (I blame the designer). There is a tiny shelf on the inside of each lifting post to receive the handrail and it can be really tricky to get it in.  Of course that might just be me!

The last detail is the horns.  This is 3D printed and can be a bit delicate.  I brush painted it with UP Harbor Mist Gray.

Located on the top of the shell is a hole to receive the peg in the underside of the horns.  When designing these locomotives, reference photos of the roof were very hard to find and I was unsure if the C-855B had horns or not.  So I’ve made allowances for them on the C-855B and leave it up to you to decide.

The last parts to add are the sand boxes and handrails which I’ve left till last as these are the most likely parts to be damaged when handling the model. I’ll cover installing all of those in next week’s post which should complete this build.