Testing A DCC Auto Reverser and Reversing Section

Just like last week’s post, this week’s is a how-to regarding DCC electronics.  In particular it’s about DCC auto reversers, and how to quickly test they are working.

Why test them?  Well if you have one installed and the system isn’t working it’s a good idea to test the auto reverser away from the layout as it may not be the part at fault. In that case changing it won’t help.

Before I show you how I test them, I will explain how an auto reverser works, and why we need them as I often get asked this.

Imagine you have a straight railway and at one end you have a single point/turnout.  The first track coming out of the point leads to the other via a loop or balloon as in the image below.

loop-track

This allows you to turn a train around but it also creates a problem in that the rails will short each other out.  If you look at the image again you see that the upper rail in the straight section runs around the loop and connects to the lower rail.  This is called a dead short.

To stop this, both rails need to be isolated in two places and in this situation it makes sense to do it just after the point, as shown below.

loop-track-2

The power to the loop can then be supplied separately allowing the polarity to be switched.  This allows a train to run into the loop and stop.  Then a switch is thrown reversing the polarity of the loop power.  The point/turnout is changed and the train can then proceed back onto the line facing the other way without shorting.

But what if the switch was set the wrong way upon entering the loop?  The train will short.  The same applies if you forget to stop the train; it will short when it tries to leave the loop.

This is where the auto reverser comes in.  This device automatically reverses the polarity of the track it’s supplying when it detects a short. Normally when a DCC command station detects a short it shuts the power off so nothing gets damaged.  (Shorting electrical circuits cause lots of heat which is not a good combination with model trains!)  However, the auto reverser detects the shorts and changes the polarity faster than the command station can react, therefore avoiding a shutdown.  This allows a DCC train to run around the loop, assuming the point/turnout is changed, and back out onto the line without stopping or stuttering.

Wiring in an auto reverser is fairly simple, but sometimes you may need to test it to see if it’s working without connecting it up to the layout.  Below is a typical auto reverser.

dcc-auto-reverser-1

Normally they have an input side and a switched output side.  For this one the input is the two red wires.  For the test I have simply used a section of track which is connected to my DCC command station at my work bench.  I quickly soldered the two red wires to the rails, it doesn’t matter which wire goes to which rail.

dcc-auto-reverser-2

Then starting with one of the yellow wires, I touch it to one of the rails.  At the heart of the auto reverser is a relay and you can normally hear it trigger when one of the wires touches a rail of the opposite polarity.  At this stage if the command station beeps or shuts down due to a short, the auto reverser is faulty.  Assuming the command station did not shut down, do the same with the other yellow wire.  Then do both together, but always on different rails as the yellow wires should not touch each other. If that works well then the auto reverser is working properly and is ready to be installed into your layout.

If you wanted to test your auto reverser because it wasn’t working when installed, but it passes the test above, then here are some other things to check.

Are both rails in your reversing section isolated from the rest of the layout? This may cause the loop to work in one direction but not the other.

Is the auto reverser installed the right way round?  The DCC supply needs to be connected to the input side.

Is the reversing section too short?  It needs to be longer than your longest train otherwise the front will try and trigger the auto reverser and the rear will try and put it back.

Is the section you are reversing drawing too much current?  For example: is the section you are reversing a whole staging yard with lots of locomotives in?  Most auto reversers are only designed for about 1 amp and several sound locos could be drawing a lot more.

Is the auto reverser close to the section you are reversing?  The further away it is the longer the wires and the higher the chance of resistance in the wire affecting the short detection circuitry.

Are the DCC wires and track feed wires bunched together?  Having the positive and negative wires directly next to each other can cause problems with the DCC signal due to inductance.  This is the magnetic field generated by each wire affecting its neighbour.

Hopefully this will help in diagnosing any problems you may be having with your auto reversing sections.

Next week I plan to share with you my designs for another 3D printed project, this one should be the first of several I have on the drawing board.

Identifying Your DCC Decoder

This week’s post is a ‘how-to’ about DCC decoders and identifying which ones you have.

As DCC (Digital Command Control) is becoming evermore popular, second-hand locomotives already fitted with DCC decoders are becoming more frequent on websites such as eBay.  It’s easy to grab a bargain but what have you actually bought?  Normally they are just listed as DCC-fitted, leaving it fairly ambiguous as to what’s inside.  Sometimes you can remove your locomotive shell and then see the make and model on the decoder.  But if it was a tricky or custom install it may not be that simple to see.

So why does it matter what the decoder is?  Just about all DCC decoders have the same basic functions, such as motor control and lights, but some are far more advanced than others and have hidden talents.  That being said the one primary thing people change is the address of the decoder, normally to match the number on the locomotive: most DCC systems have that ability no matter what the make or model of the decoder. But if you want to alter any other functions or features which the decoder may have, you will need to know what decoder you’ve got.

This can be done fairly simply by reading the value of CV8 from your decoder.  Now that isn’t as daunting as it sounds and I’ll explain how to read your decoder in a moment.  CV stands for Configuration Variable and it’s these which allow decoders to be set up how you want them.  Different CVs are allocated for different things, for example, CV3 is for Acceleration Rate or Acceleration Momentum.  The higher the value stored in this CV the slower the locomotive will accelerate.  But how do you know which CV is for what?  Well the NMRA (National Model Railroad Association) foresaw this could be a problem and have developed a set of standards for manufactures to follow.  You will notice on all reparable DCC products it will say ‘NMRA compatible’.  This means that all the systems will work with each other so you can use different make decoders and locomotives all on the same layout.

All these CVs can be read using most DCC command stations. This normally involves placing your locomotive on your programming track and selecting the CV Read function.  Depending on which DCC command system you have will depend on how this is done so you will need to look at your instruction manual.  It will ask you which CV you want to read and by selecting 8 it will return a three digit number.  This number will be the unique manufacturer number of your chip.

Again the NMRA control this. They have a list, which can be found here, which has all the manufactures of NMRA complaint DCC products listed by name and by identification number.

So for example if the number was 101 then you have a Bachmann Trains decoder.

Manufactures tend to keep the features and functions the same across their product ranges, so downloading a manual from the manufacture’s website should give you the information you need to set up your decoder.

But what if the decoder in your locomotive is an older model? And companies usually make more than one type of decoder.  To help with this the NMRA have allowed CV7 to be used as a version number by the manufacturers.

So, for example, if your decoder has a CV8 = 129 and CV7 = 49 then you have a Digitrax decoder from the ‘Series 3 with FX3’ family.  There are lots of different decoders in this family but the controls are the same so any instruction manual for a ‘Series 3 with FX3’ will give you what you need.

The NMRA do not list the contents of CV7, as this is down to the manufactures, which can make it a bit tricky to find the information.  But once you know the manufacturer, from CV8, you could email their help desk with the CV7 number and they will be able to help.

Checking the decoder type in your second-hand locos is a good idea because you may be missing out on some great features you never knew you had.

The Andover Modelex 2016

As promised in this week’s post I’ll be bringing you some photos and videos from the Andover Model Railway Club’s annual exhibition, ‘Modelex 2016’.

The exhibition was held at the John Hanson School in Andover over the 3rd and 4th of September 2016.  As expected there was a good selection of layouts and traders to entertain the crowds.  I was there along with my club, the Gosport American Model Railroad Group, and we were exhibiting our modular N Scale layout ‘Solent Summit’: well about two thirds of it.  As normal what happens with these shows is my time is consumed by operating our layout, even with a team of five it takes all of us, but I was able to get around the show and see most of the layouts.

So here is a whirlwind tour.

To start we have ‘Botleigh Old North Road’.  This is a 4mm/00 Gauge layout by Ian Corps.

andover-2016-botleigh-old-north-road-5

The layout is modeled on a fictitious engine shed on the Southern Region.

andover-2016-botleigh-old-north-road-1

The layout is all about showing off locomotives.

andover-2016-botleigh-old-north-road-2

Steam and diesel locos worked the yard; naturally the diesels looked a lot newer and cleaner.

andover-2016-botleigh-old-north-road-3 andover-2016-botleigh-old-north-road-4 
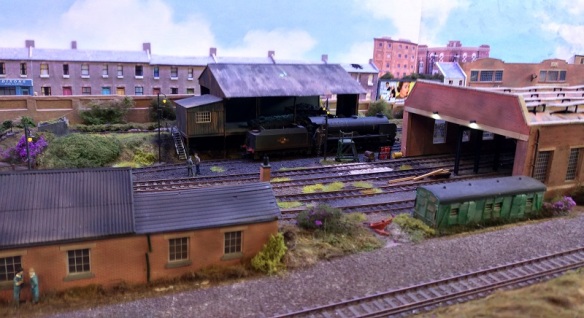
The beautiful T9 on the right reminds me of my trip to the Dean Forest Railway Gala a few months ago.

andover-2016-botleigh-old-north-road-6

The layout itself had a lot of detail and I’m sure I could spend hours looking at it before I found everything.

andover-2016-botleigh-old-north-road-7

I think the Q1 on the turntable needs a good scrub!

andover-2016-botleigh-old-north-road-9 andover-2016-botleigh-old-north-road-10

Next we have the first of two O scale layouts ‘Goonhilly’ built by Steve Rogerson of the Andover Model Railway Club.

andover-2016-goonhilly-1

O scale is fantastic at showing detail, in the guards’ van or ‘Toad’ the crew are sitting down having a chat while the class 14 and auto coach trundle into the station.

andover-2016-goonhilly-2

At one end of the layout was a beautifully modeled bridge.

andover-2016-goonhilly-3 andover-2016-goonhilly-4

The first N gauge layout is ‘Barrack Way’ built by Dave & Rene Lear.  The layout is aptly names and it’s based around a large army barracks.

andover-2016-barrack-way-1

As with all Dave & Rene’s layouts it’s the hundreds of vehicles, people and scenes that makes them fun and this one is no exception.

andover-2016-barrack-way-2 andover-2016-barrack-way-3 andover-2016-barrack-way-4 andover-2016-barrack-way-5 andover-2016-barrack-way-6

Next we go to a layout modeling an imagery terminus next to an alpine lake in Switzerland, ‘Schwarzee’, built by Martin Axford.

andover-2016-schwarzee-1 andover-2016-schwarzee-2 andover-2016-schwarzee-3

Mike showed me pictures of the actual building he based the station on from his travels in Switzerland and he has this one spot on.

andover-2016-schwarzee-4 andover-2016-schwarzee-5

The next layout was, I think, the best in the show and it won the public choice for best in show as well.  ‘Lydgate’ built by Dave Spencer is an imaginary 4mm/00 Gauge layout based on the railways of the industrial Forest of Dean.

andover-2016-lydgate-1

As I’m from the town of Lydney in the Forest Of Dean, and have been a member of the Dean Forest Railway for most of my life, this layout was a joy to see.

andover-2016-lydgate-2

The attention to detail was wonderful and the depth created by the scenes transported me back to the forest.

andover-2016-lydgate-3  andover-2016-lydgate-5

andover-2016-lydgate-4 andover-2016-lydgate-6 andover-2016-lydgate-7

The second O scale layout was ‘Praa Sands’ built by Tony Collins also from the Andover Model Railway Club.

andover-2016-praa-sands-2
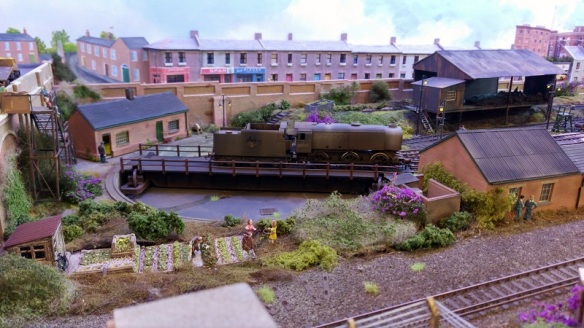
Again O Scale is fantastic for detail and this GWR tank looks just like the real thing.

andover-2016-praa-sands-1

The next N Gauge layout is ‘Garsdale Head’ built by Michael Le Marie.

andover-2016-garsdale-head-1

It is designed to have a Settle & Carlisle look (an iconic railway in the UK) and it does that well.

andover-2016-garsdale-head-2 andover-2016-garsdale-head-3 andover-2016-garsdale-head-4 andover-2016-garsdale-head-5

‘James Town’ is the next layout although it has nothing to do with me!  It belongs to Andrew & James Bernett and is a fictitious American-themed On30 layout and was lots of fun.

andover-2016-james-town

The layout has several loops on different levels with a variety of trains running around.  Below is a short video of one of the larger steamers passing by.  As you can see from the character in the foreground, from the movie ‘Cars’, having fun is what this layout is about.

‘Mortonhampstead’ is the next layout and is 4 mm/OO Gauge.  Built by Andy & Ryan Lamb it depicts a branch line terminus.

andover-2016-mortonhampstead-1 andover-2016-mortonhampstead-2 andover-2016-mortonhampstead-3 andover-2016-mortonhampstead-4

There were also four other layouts at the show, two I have covered in other exhibition reviews so I will simply link back to those, but it was nice to see them again.

Brighton East – 4mm/EM Gauge layout built by David Smith.

Hollow Fosse – 3mm / TT Gauge layout built by John Thomas.

‘Portsea’  –  3mm / TT Gauge layout built by Paul Hopkins & John Wakeman.  Sadly I didn’t get any photos of this great layout thinking I had already covered it in a different exhibition review; so it will have to wait until the next time I see it.

The fourth layout is ‘Croydon North Street’ built by Darren Johnson, this lovely layout will be appearing in the Poole Model Railway Exhibition on the 6th of November so I will share it with you then.

So that just leaves our layout, ‘Solent Summit’.  For this exhibition we had 23 of our scenic modules plus the two big yards and I managed to catch some shots and videos from different points.

An A+B set of Northern Pacific F7s leaving ‘Cascade Falls’ with a local freight.

andover-2016-solent-summit-2

A pair of Burlington Northern SD24s on the oil train.

andover-2016-solent-summit-3

The oil train rumbled on through town heading for ‘Solent Summit’ in the video below.

A lone Santa Fe SD45 switched ‘Dilithium Propellants’ as the big trains rolled by.

andover-2016-solent-summit-4

A Great Northern switcher collects paperwork from the tower at the lumber yard ready for the day’s work.

andover-2016-solent-summit-5

Sierra Railroad no. 38 waits with a former Northern Pacific rotary snow plow, heavy snow is forecast for tonight high on the pass.  The Union Pacific Portland Rose awaits its departure from ”Solent Summit and over the pass, hopefully before the snow starts.

andover-2016-solent-summit-6

The UP Portland Rose is now ready to head out from ‘Solent Summit’.

andover-2016-solent-summit-11

In the video below the Portland Rose crosses the ‘Warsash Wye Trestle’ just past ‘Solent Summit’. As the last of the cars clear the station limits and the heavy challenger clears the trestle the driver opens the regulator.

The UP was also handling the troop train as it passed through town.  This Big Boy made light work of this heavy train.

The BN oil train finally arrived in ‘Solent Summit’ just ahead of the Southern Pacific Daylight powered by an A-B-A lash up of Alco PAs.

andover-2016-solent-summit-7

A long UP freight powered by a GP35, GP7 and a pair of GP20s crosses the ‘Warsash Wye Trestle’ and runs through ‘Solent Summit’.

As well as snow, ‘Solent Summit’ must be expecting power trouble tonight because UP have supplied an old EMD DD35 to provide power for the small town.

andover-2016-solent-summit-8

Sierra 37 & 39 double head a freight train past ‘Watson’s Siding’.

The Santa Fe California Limited passes ‘New Mills Halt’, this train is too important to stop here and runs on west.

The Aloc PAs prepare to leave ‘Solent Summit’ with the SP Daylight jumping ahead of the BN oil train.

andover-2016-solent-summit-9

The Virginia Rail Express Commuter train powered by a MPI MP36PH-3C waits at ‘New Mills Halt’ for the shift change at the factory.  The factory still uses the trusty Shay to move boxcars around.

andover-2016-solent-summit-10

I had a great time at the Andover Modelex 2016 and I could not have done it without my club.  Thanks to the Andover Model Railway Club and to my team for putting on a great show.  From the left, Chris, myself, Bernie, Ted, Morgan & Chris.

andover-2016-solent-summit-1

‘Solent Summit’, well parts of it, will next be appearing at Fareham Railex on 1st and 2nd of October, the 28th to the 30th of October at the NMRA(BR) convention in Meriden, the 6th of November at the Poole And Districts Model Railway Society’s annual exhibition and the 10th and 11th of November at the Hampton Court Model Railway Societies Tolworth Show.

Maybe we will see you there.

One Exhibition to the Next

In last weeks post I had promised to bring you some photos and videos from the Andover Model Railway Exhibition however it was fairly late by the time I got home Sunday Night and today is my wedding anniversary so the overview from the show will have to wait until next week.

In the meantime; next weekend is the Swindon Railway Festival 2016 and I will be there on the Sunday operating the wonderful layout ‘Horfield’ which depicts the GWR four track main line between Bristol & South Wales.  Maybe I will see you there.