Drawing a Baldwin RT-624 for the Pennsylvania Railroad

Earlier this year I designed an N Scale shell for a Baldwin DT-6-6-2000 transfer locomotive.  You can read about it here. This locomotive type was later refined by Baldwin and became the RT-624.  In this post I will tell you a bit about the RT-624 and share with you the design for the new locomotive.

The RT-624 is the natural development to the DT6-6-2000.  Built between 1951 and 1954 the locomotive was still classed as a transfer unit, designed for moving strings of freight cars between local yards in big cities.  It was a heavy locomotive giving it great traction, plus it had, for its time, a lot of horsepower.  Baldwin had started changing their naming convention for locomotives by this stage; this locomotive was sometimes called a DT6-6-2400 but Baldwin’s correct name was RT-624.  RT stands for ‘Road Transfer’, 624 stands for 6 wheels per truck and 2400 horsepower.  To achieve the extra 400 horsepower Baldwin replaced the pair of 606SC supercharged diesel engines with their newer 606A supercharged diesel engines.  These each produced 1200 horsepower and were more reliable.

Baldwin also moved some of the air vents and grill work on the side to help with air flow around the engine compartments. The DT6-6-2000 was almost symmetrical but the RT-624 had one walkway that was a different shape to the rest. This one had a longer raised section allowing for more battery storage under the walkway.

Baldwin made twenty-four of these behemoths; one was purchased by the Minneapolis Northfield & Southern and numbered Twenty Five.  Here is a picture of it taken on the 21st of June 1964 at Glenwood Junction, MN by Marty Bernard (www.rrpicturearchives.net).

You can see it very closely resembles the DT6-6-2000, the headlight is lower and you can see where Baldwin has lowered the grills.

The other twenty-three were purchased by the Pennsylvania Railroad.  The first fourteen, built in 1951 and numbered 8952-8965, ran on the same Commonwealth Trucks as the DT6-6-2000.  Here is a photo of 8963 taken on the 21st November 1966 in Pitcairn, PA by Ryan Kertis.  (www.rrpicturearchives.net).  8963 did not have a lowered headlight but it did have additional grill work on the sides.  You can also see on the right of the photo the walkway runs at the higher level for longer, creating the larger space.  Also apparent in this photo are the antennae on the roof for the uniquely PRR train phone system.

The next eight, built in 1952 and numbered 8724-8731, ran on newer Outside Equalized Trucks.  Here you can see loco number 8728 and an unknown sister engine. The photo was taken on the 17th of July 1965 at Porter, DE by Jeff Van Cleve. (www.rrpicturearchives.net). In the photo you can see the lowered headlight and single lowered grill as well as the newer Outside Equalized Trucks.  Also the end handrails have been revised to include a folding down walkway allowing crew to move between locomotives when double heading.

Here is another photo of a pair of PPR RT-624s.  Taken on the 6th June 1961 at Paoli, PA by James Gillin. (http://rrpicturearchives.net).

The last locomotive, number 8113, was built-in 1954 and was the same as the previous eight.

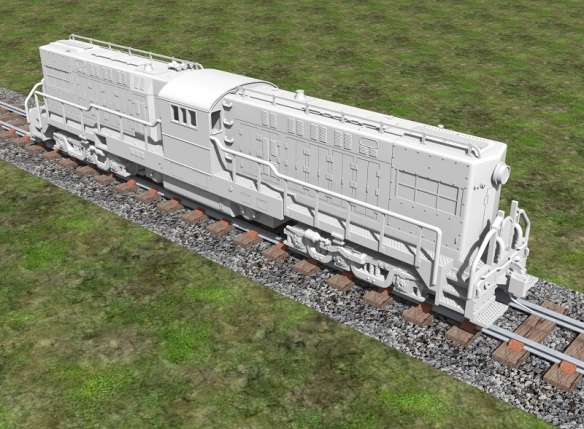
The model I have been working on will be based on the PRR locomotives built in 1952 with the Outside Equalized Trucks.  Because the donor chassis will be the same, an Atlas C-628/C-630, and because the basic shape is the same the majority of the model has already been drawn.

The first job was to move the grills on the ends, in the image below you can see the grills in their new position.

Baldwin RT-624 Shell

This image also shows the modified walkway on the left hand side with the storage space below as well as the lowered headlight.  The PRR also mounted their number boards in a different place than the Santa Fe on their DT6-6-2000, you can see the oval number board on the side of the main body above the first set of engine doors.  The main body also has some different detail parts on the nose and the roof that have been added as well as shorter exhaust stacks.

The new truck side frames have been draw from scratch although I was able to use the same mid section where the truck clips onto the Atlas chassis truck. Baldwin RT-624 Shell 2

Baldwin RT-624 Truck RenderThe PRR train phone antennae were a bit more tricky to do.  Given the size they would need to be if 3D printed I felt that they would look way too chunky and very unrealistic. So these have been made as separately applied brass detail parts.  Only the section of antenna which is raised off the roof on posts is an added detail, the cable section that runs down and around the cab windows are molded into the main body as shown below.

Baldwin RT-624 Shell 4

The handrails are again printed inside the main body to protect them and will need to be cut out and removed from their sprue before they can be applied.  The new end handrails come with the new link walkway attached.  Below is the view from the inside.

Baldwin RT-624 Shell 5

And here is the view from the outside.

Baldwin RT-624 Shell 6As with my DT6-6-2000 I am also offering a brass Additions kit for this locomotive which will include all the handrails, two roof antennae, two sun visors and four air pipes which can be added as an extra detail next to the coupling.  I have supplied four because I think gluing two together before they are installed will give the desired thickness.

Baldwin RT-624 Additions Render

Unlike the DT6-2-2000 the fuel and air tanks are visible on the RT-624.  This is because the RT-624 does not have the large flange plates which hung down on the DT6-2-2000.  This means that the lower section of the Atlas C-628/C-630 chassis will be visible so I have drawn a replacement fuel and air tank section which will clip onto the Atlas chassis using the same fixing points.

Baldwin RT-624 Shell 3

When the locomotive is assembled, it will look like this. Baldwin RT-624 Render 1 Baldwin RT-624 Render 7 Baldwin RT-624 Render 6 Baldwin RT-624 Render 4 Baldwin RT-624 Render 3 Baldwin RT-624 Render 2Baldwin RT-624 Render 8The 3D printed kit will be available from my Shapeways shop printed in the Frosted Ultra Detail material and the brass Additions will be available directly from me, please contact me through the contacts page.

This will also be the first kit that I will be offering in a higher print quality than the Shapeways FUD material.  This will come from a 3D print bureau in London which is offering custom one-off print runs.  The Shapeway FUD material prints at a layer thickness of 29 microns or Ultra High Definition (UHD) which is still far better than just about any other 3D printer currently available.  However it is now possible now to get this kit printed using the same 3D printer but at a 16 micron layer thickness.  This is called Extreme High Definition (XHD).  At the XHD print setting, the layering effect that can sometimes be seen on all 3D prints, is greatly reduced.  Another advantage to using this 3D print bureau is they allow you to specify the orientation of the model; this is important, because if a model is printed upside-down, detail which is resting on the build plate may not be as clear as detail on the top of the print.

However this service does come at a cost.  The XHD model is three times the price of the UHD or FUD from Shapeways.  This is because the print time is greatly increased due to the higher number of layers which need to be printed.  Also because of the orientation, the main body of the locomotive has a large space inside which needs to be filled with support material in order to print the roof of the shell.  At this high level of printing the support material is nearly as expensive as the build material.  Companies like Shapeways can reduce the print cost to the customer by using this space to print other models; if the models are packed densely in the print tray, less support material is used which brings the cost down.

The test print for this model is currently printing at Shapeways in FUD. Once I have received and checked everything fits okay I will make it available in both FUD from Shapeways and XHD direct from me.

If you are interested in a XHD print please contact me through the contact page.

In next week’s post I will share with you another new product which will make good use of any spare Atlas C-628 or C-630 shells.

Poole & District Model Railway Society’s 2014 Exhibition

As promised in last week’s post this week I am going to share with you some photos from this year’s Poole & District Model Railway Society’s 2014 Exhibition.

The exhibition was held in Poole Grammar School on Sunday 9th of November and for this one day show there is always a good turnout.  This year there were thirteen layouts on show and a good number of trade stalls covering everything from base board construction to ready-to-run trains.

To start with we have an N Scale layout set in 1912 Altenholz, Bavaria.

P&DMRS 2014 - Altenholz 1

The layout was very nicely finished in a surrounding display case with built-in lighting giving a realistic look to the scenery, particularly because of the great shadows.

P&DMRS 2014 - Altenholz 2 P&DMRS 2014 - Altenholz 3

This German railway is based on the Royal Bavarian State Railways or KBayStsB.

P&DMRS 2014 - Altenholz 4 P&DMRS 2014 - Altenholz 5 P&DMRS 2014 - Altenholz 6

All the track work and most of the rolling stock are made by Fleischmann.

P&DMRS 2014 - Altenholz 8 P&DMRS 2014 - Altenholz 9 P&DMRS 2014 - Altenholz 10 P&DMRS 2014 - Altenholz 11 P&DMRS 2014 - Altenholz 12 P&DMRS 2014 - Altenholz 13 P&DMRS 2014 - Altenholz 14 P&DMRS 2014 - Altenholz 16

The little loco pictured above is a 0-4-4-0 mallet locomotive and ran like a sewing machine.  Given the limited number of wheels for electrical pickup and traction this locomotive was smooth and pulled very well.

P&DMRS 2014 - Altenholz 17 P&DMRS 2014 - Altenholz 18 P&DMRS 2014 - Altenholz 19 P&DMRS 2014 - Altenholz 20

The most curious little locomotive was an 0-4-0, as pictured below.

P&DMRS 2014 - Altenholz 21 P&DMRS 2014 - Altenholz 22 P&DMRS 2014 - Altenholz 23

Here is a short video of a freight train running over the viaduct.


The next layout is Camlas; this was built by the same person who also built Holm which you can see here.

P&DMRS 2014 - Camlas 1

This is 00 Gauge Great Western Railway based in Carmarthenshire near the Welsh/English border.  Camlas is Welsh for canal, and yes the layout has a canal.

P&DMRS 2014 - Camlas 2

The canal runs past the warehouse buildings at the front right of the layout.

P&DMRS 2014 - Camlas 3 P&DMRS 2014 - Camlas 4 P&DMRS 2014 - Camlas 5 P&DMRS 2014 - Camlas 6 P&DMRS 2014 - Camlas 7 P&DMRS 2014 - Camlas 8 P&DMRS 2014 - Camlas 9 P&DMRS 2014 - Camlas 10 P&DMRS 2014 - Camlas 11

Next we go up a scale to the O Scale layout Danbee.

P&DMRS 2014 - Danbee 1

This beautiful layout is also a GWR branch line railway

P&DMRS 2014 - Danbee 2 P&DMRS 2014 - Danbee 3 P&DMRS 2014 - Danbee 4 P&DMRS 2014 - Danbee 6 P&DMRS 2014 - Danbee 7 P&DMRS 2014 - Danbee 8 P&DMRS 2014 - Danbee 9P&DMRS 2014 - Danbee 10 P&DMRS 2014 - Danbee 11 P&DMRS 2014 - Danbee 12 P&DMRS 2014 - Danbee 13 P&DMRS 2014 - Danbee 14 P&DMRS 2014 - Danbee 16 P&DMRS 2014 - Danbee 17 P&DMRS 2014 - Danbee 18

The track work on this layout is made by Peco.

P&DMRS 2014 - Danbee 19 P&DMRS 2014 - Danbee 20

This layout had one of my favorite GWR trains, the classic railcar or ‘flying banana’ as it was often affectionately called.

P&DMRS 2014 - Danbee 15

Here is a short video of the railcar leaving Danbee station

Next we are at Mallingford.  This is an N Scale layout based on the station used in the 1953 movie, ‘The Titfield Thunderbolt’.

P&DMRS 2014 - Mallingford 8

There are several references to the movie including Sid James on his steam roller!

P&DMRS 2014 -  Mallingford 7 P&DMRS 2014 - Mallingford 1 P&DMRS 2014 - Mallingford 2 P&DMRS 2014 - Mallingford 3 P&DMRS 2014 - Mallingford 4 P&DMRS 2014 - Mallingford 5 P&DMRS 2014 - Mallingford 6

The quality of detail on this layout is fantastic, my photos don’t do it justice. Every part has been customized and weathered to look just it would have done back then.

P&DMRS 2014 - Mallingford 9

Stepping up a size we now go Teignford which is a TT (1:120) or 3mm Scale layout.

P&DMRS 2014 - Teigford 2

3mm Scale is roughly half way between OO (HO) and N Scale and dispite being an avid N Scaler I think it is the perfect size.  Not too small and too big.  However, as it is not one of the more popular scales the majority of rolling stock, building and track needs to be scratch built.  3D printing is an ideal tool for this scale and there were some 3D printed locomotives on the layout.

P&DMRS 2014 - Teigford 5 P&DMRS 2014 - Teigford 7

The use of the low relief building to help blend in the backdrop was very effective.

P&DMRS 2014 - Teigford 8 P&DMRS 2014 - Teigford 9

The track work used on this layout is Peco’s HOm gauge.  Designed for narrow gauge trains in HO Scale it is ideal for TT.

P&DMRS 2014 - Teigford 10 P&DMRS 2014 - Teigford 11 P&DMRS 2014 - Teigford 12 P&DMRS 2014 - Teigford 13 P&DMRS 2014 - Teigford 14 P&DMRS 2014 - Teigford 15

Stepping up in scale again we are at Ruggin Manor Peatworks.

P&DMRS 2014 - Ruggin Manor Peatworks 1

This self contained layout is packed with detail and was fun to watch.

P&DMRS 2014 - Ruggin Manor Peatworks 2

The track scale is GN15 which is an unusual gauge.  GN15 is G Scale (1:20.3 to 1:24) running on OO/HO Scale track.

P&DMRS 2014 - Ruggin Manor Peatworks 3

There was so much to see on this layout; the little details are subtle which makes them even more believable.  There is a tiny blue bird on top of the milk bottle, nervously eyeing the cat on the step.  The cat jumping onto the wall at the back has spotted a rabbit in the hedge.

P&DMRS 2014 - Ruggin Manor Peatworks 4 P&DMRS 2014 - Ruggin Manor Peatworks 5

The characters are fantastic, the driver of this train looks like he has stopped for the photo, the foreman on the top step is not so impressed!

P&DMRS 2014 - Ruggin Manor Peatworks 6

The detail goes through to the back of each building, completing the realism.

P&DMRS 2014 - Ruggin Manor Peatworks 7 P&DMRS 2014 - Ruggin Manor Peatworks 8

Another cat dozes on the chair just inside the door.

P&DMRS 2014 - Ruggin Manor Peatworks 9 P&DMRS 2014 - Ruggin Manor Peatworks 10 P&DMRS 2014 - Ruggin Manor Peatworks 11

Now we go back to N Scale to visit Bodmore Vale.

P&DMRS 2014 - Bodmore Vale 2

Bodmore Vale is a mix of rural and industrial scenes with four running tracks, so there is always something moving.

P&DMRS 2014 - Bodmore Vale 3 P&DMRS 2014 - Bodmore Vale 4

I particularly liked the two traction engines on the big truck, it blends the vintage with the modern era.

P&DMRS 2014 - Bodmore Vale 5

Everywhere you looked there something going on.

P&DMRS 2014 - Bodmore Vale 6

P&DMRS 2014 - Bodmore Vale 1

At the front of the layout between the two pairs of main lines is a canal scene with barges.

P&DMRS 2014 - Bodmore Vale 7 P&DMRS 2014 - Bodmore Vale 8 P&DMRS 2014 - Bodmore Vale 9 P&DMRS 2014 - Bodmore Vale 10

Stepping back up to O Scale we next come to Ellen Green.

P&DMRS 2014 - Ellen Green 14

Ellen Green is a beautifully modeled branch line small station halt and industrial scene set on the Southern Railway.

P&DMRS 2014 - Ellen Green 15 P&DMRS 2014 - Ellen Green 16 P&DMRS 2014 - Ellen Green 17 P&DMRS 2014 - Ellen Green 18 P&DMRS 2014 - Ellen Green 19

P&DMRS 2014 - Ellen Green 25

Although this is the Southern Region a coal wagon from Parkend Deep Navigation Collieries has made it down here. This is one of my favorite UK wagon liveries as I grew up just a few miles from Parkend in the Forest of Dean, and I also worked for many years on the Dean Forest Railway which runs tourist trains to Parkend.

P&DMRS 2014 - Ellen Green 20 P&DMRS 2014 - Ellen Green 3 P&DMRS 2014 - Ellen Green 1The last four layouts at the show, all fantastic layouts, have recently been covered in other posts so rather than repeat myself you can find out more about them in the relevant posts using the links below.

Sawpit Creek built by Neil Lancaster.

Sumach Grove  built by John Levesley.

Gorpeton Blymee By Wimborne Railway Society.

Corris by Rod Allcock.

Corris won the People’s Favorite Layout award at this year’s show.

One other group that was at the show was the Slim Gauge Society and although they did not have a layout they did bring some of their fantastic locomotives.

P&DMRS 2014 - Slim Gauge Society 1 P&DMRS 2014 - Slim Gauge Society 2

And that was the Poole & District Model Railway Society’s 2014 Exhibition.

Next week I will be getting back to my new 3D printed projects which are coming out soon; I currently have a big order coming from Shapeways, not just in volume but containing the largest print I have done to date, which I look forward to sharing with you.

Couplings in a Cage

Last month I shared with you my design to contain lots of replacement short Rapido couplings inside a cage-style container.  You can find the post here.  In this post I wanted to show you how it all came out.

The reasons for making this cage were to firstly keep the hundreds of small parts contained and secondly to reduce the cost of the parts.  These have been printed by Shapeways and their new pricing structure, although reducing the cost of their Black Strong & Flexible material, now takes into account a fee per individual part.  So as you can imagine, printing several hundred loose parts will incur a hefty fee. To counteract this the cage was designed so that it used the least amount of material but did not have any holes large enough for the parts to fall out: therefore Shapeways treat it as one item when pricing it for printing.

Rapido Replacments Cylinder

This particular cage has been designed to hold 240 short Rapido couplings, in the computer model the cage appears densely packed, as shown below, allowing for the spacing between each part.  This is because there has to be a minimum gap between each part, otherwise they could be unintentionally joined together by the 3D printer.

3D Printed Cage Full Render - Short Rapido Couplings 3

When the actual print arrive it appeared to be only half full.  This is because once the support material which provides the spacing had been removed all the couplings fall to the bottom of the cage.

3D Printed Cage - Short Rapido Couplings 1 3D Printed Cage - Short Rapido Couplings 2

The cage structure is, as the name of the material suggests, very flexible and can easily be squeeze in the middle sections where the material is at its thinnest but it retains its strength and springs back into shape.  The end rings forming the 90° corners are strong however that is more to do with the design of the structure.

To remove the couplings I used a pair of side cutters to cut out a section from the top; then they could be emptied out as required.

3D Printed Cage - Short Rapido Couplings 3

This is a very effective method of printing hundreds of these couplings at once without the need to mount them on a sprue thus removing the need to cut them off before they can be used.

This container of 240 couplings is available through my Shapeways here.

I also offer these replacement short Rapido couplings in packs of 20 for £5.  Please contact me through the contact page or you can email me directly at jamestrainparts@yahoo.co.uk if you would like a set, or more.

This weekend just gone I was at another train show, November is a busy month for shows here in the UK, and in next week’s post I will show you some of the layouts at the show.

The NMRA (BR) Annual Convention 2014 – Part 3

This week is the final part of my overview of the layouts at this year’s National Model Railroad Association (British Region) annual convention which was held in Bournemouth. You can find the previous two parts here and here.

I have four layouts to share with you and to start off we are going to Stevens Point, a HO switching layout built by Chris Prior.

Stevens Point - NMRA 2014 8 Stevens Point - NMRA 2014 7 ‘Stevens Point is a mid-sized town in Central Wisconsin approximately 250 miles north of Chi-cago in the Mid-West of the United State. In railroad terms the town is better known for be-ing on the former Wisconsin Central (WC) main line and acted as its’ operational base. How-ever, the other railroad in town was the Green Bay and Western (GBW) at least it was taken over by the WC in 1993.

The inspiration for this layout was a picture of an Alco C-424, 312, switching the paper mill in 1987, shortly after the WC (my other road) started operation. I didn’t know that this section of railroad had existed, despite living in Stevens Point for a year, as the area in the picture was abandoned and paved/ grassed over when the paper mill was expanded in the late 1980’s.

Industry in the Stevens Point Downtown area and rail- served by the GBW included the Con-solidated paper mill which has its’ own hydro electric power plant using water from the Wis-consin River, Vetters, a window and door manufacturer, the Pagel Mill, a seed and feed dis-tributor, Bake Rite, a bakery (who’d have guessed) and most importantly the Point Brewery! With variety the industry on the layout most US car kinds can be seen being spotted for load-ing/unloading. The rolling stock comes from all the major US manufacturers, although I have a particular liking for Exactrail!’ (X2014 News, NMRA (BR) Convention Guide, 2014). Stevens Point - NMRA 2014 19 Stevens Point - NMRA 2014 14

The season for the layout is early Fall and the trees are starting to turn, some have already started to drop their leaves creating a lovely scene for the trains to rumble through.

Stevens Point - NMRA 2014 15 Stevens Point - NMRA 2014 16 Stevens Point - NMRA 2014 17 Stevens Point - NMRA 2014 18

Here is Chris’ C-415 recreating his scene from 1987.

Stevens Point - NMRA 2014 11 Stevens Point - NMRA 2014 10 Stevens Point - NMRA 2014 9 Stevens Point - NMRA 2014 6 Stevens Point - NMRA 2014 5 Stevens Point - NMRA 2014 4 Stevens Point - NMRA 2014 3

Although compact, the layout gives a nice sence of space and offers plenty of switching between all the industries.

Stevens Point - NMRA 2014 2Stevens Point - NMRA 2014 1
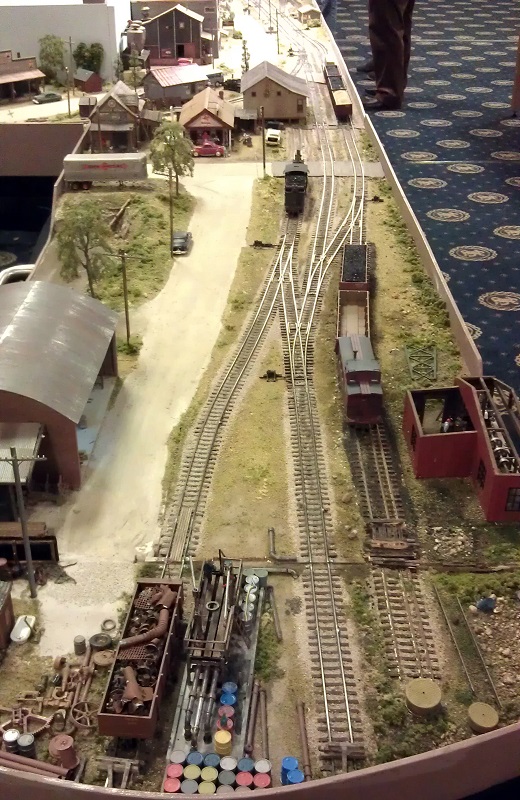
Next we switch to N Scale for the largest layout at the convention; Black Diamonds’ huge modular layout.

Black Dimonds -NMRA 2014 6

I don’t have an overall shot of the layout, it was too big, but in the photo below you can see part of it in the background with the blue State Of Oregon banner on the side.  In the foreground is the British Region HO Modular Setup and the Bearwood Group HO Modular Layout.

NMRA (BR) 2014 - Main Hall 1

‘The Black Diamonds modular setup comprises a number of modules. Starting from the East end we have “Salute Yard”, this is our six track holding area which has had extensive work done to it and now looks very different to the bare boards shown before and is in the position it was designed for as entry to the “Station” the second major module make its début as part of the layout. This is based on Ogden, UT.

 The next is Warehouse Junction with the junction track giving access while the main heads into another new module “Oregon City”. This module is based upon the depression area and the trestle bridge that runs through it. The model has a 2m long trestle running through the industrial sector. At each end of this section are the new boards that connect our two track standard to the FreemoN standard. These adaptor boards will enable us to connect with the many FreemoN boards across the UK. Following Oregon City we have “Q Tower” and the “Creek” leading into our third end loop.’ (X2014 News, NMRA (BR) Convention Guide, 2014).

I have seen this layout in several configurations before, each time with new sections.  Below is the updated “Salute Yard” and the work that has been done makes it look very good, although it is fundamentally the entrance to the staging area and reversing loop, having ballasted track, yard and engine facilities and a station make it into a scene in its own right.

Black Dimonds -NMRA 2014 1

The road bridge is positioned perfectly to hide the actual staging area.

Black Dimonds -NMRA 2014 2

This then leads into the huge new station area which is based on Ogden, UT.

Black Dimonds -NMRA 2014 3

Here is a Penssy 4-6-2 passing through with a local passenger train.

Black Dimonds -NMRA 2014 4

Here is the 2m trestle running over the Oregon City area.

Black Dimonds -NMRA 2014 5

This was a good spot to get some video.  Here we can see the SP tugging one of Black Diamonds’ lovely long trains over the trestle.

Coming the other way, the BN works a long mixed freight; it came to a stop because it was waiting for a clear line at Warehouse Junction.

Warehouse Junction runs in front of and between the two warehouses in the picture below.

Black Dimonds -NMRA 2014 12

This long train of tanks powered by the UP also made several appearances.

Black Dimonds -NMRA 2014 8Black Dimonds -NMRA 2014 9

Here we catch up with the SP again as it passes in front of Warehouse Junction.

The Black Dimonds’ layout is great for showing big vistas.

Black Dimonds -NMRA 2014 7  Black Dimonds -NMRA 2014 10 Black Dimonds -NMRA 2014 11

There’s always a lot of Pennsy action on the Black Dimond layout.  Here is a huge 2-10-4 J1 pulling a long passenger train.  Black Dimonds -NMRA 2014 13

Here we see the J1 running from Warehouse Junction to Ogdon Station.  Coming the other way is a mighty B&O EM1 on a long coal drag.  Chasing up the J1 is an Amtrak Passenger.

One of the interlopers I spotted on the Balck Diamonds’ layout was Dirk Jan Blikkendaal’s 4-6-2 made by Pecos River Brass. It is a model of ATSF 3420 and here is what Dirk has to say about it.

It is a nice model but was a poor runner and Hans Starmans (Nstars) designed and made a new tender-drive with a lot of lead as a bonus. This left the boiler and firebox empty…… 

Then I put a Tsunami 750 Micro Medium Steam decoder in the firebox. In the boiler I put a Soundtraxx Currentkeeper, just in front of the decoder (I had to widen the slot in the bottom of the boiler a little bit with a Dremel but all wires and electrical devices are invisible).

The headlight is an LED. On the main driver axle I put a camdisc against the remaining large gear to synchronise the exhaust.

Sound comes from a Zimo sugarcube speaker 8 x 8 x 12 mm which I put in the tender just on the cab side.  There are 6 wires (2 pickup, 2 motor, 2 speaker )running from cab to tender, all black and very small, therefore hardly visible…… They came from (www.ledbaron.de).

 Next to the Currentkeeper I put some lead strip in the boiler, to give some extra weight on the front driver for better tracking.

It runs well and pulls over 70 cars on my layout and it pulled 54 hoppers on the Black Diamond layout with ease.’

Here we can see Dirk’s ATSF 3420 pulling out of Salute Yard with a Pennsy freight. (Well I did say it was an interloper!)

And just to show you how strong this loco is, here it is coming back pulling two trains combined.

Another interloper I spotted also belonged to Dirk.  It was his ATSF doodlebug number M-183.

Dirk says ‘I bought 2 Bachmann cars, splicing and lengthening them to the correct car length.  In the process I used both drive trains, in real life these motor cars would pull freight cars and a caboose every now and then on their trips.

I also modified the rooftop mufflers and cooling coils to look like ATSF and I replaced the motor with a better one….

Then I added a Digitrax SDXN136PS 16 bit decoder with a new uploaded soundscheme M190 by John McMasters (this can be found in Yahoo group DIGITRAXSOUND).’

Here it is running on the Black Diamonds’ Layout.

Next we are back with HO and Fulton Terminal, Brooklyn, NY built by Andrew Browne.

Fulton Turminal - NMRA 2014 2

‘Fulton Terminal was situated on the East River operated by the New York Dock Railway and was one of a large number of similar rail terminals, around the Upper New York Bay and Hud-son River area, connected together by the river. In 1954 railroad companies employed almost 2000 vessels in this trade tugs, barges, car floats (a barge fitted with rails) and various special craft, all bar one closed following the takeover of containerisation, Fulton Terminal closing in 1982.

The model is closely based on the original and is full size, it is not intended to be an exact replica, I have altered various details, and Pier 12 was not directly rail served. The line con-tinued south to serve Piers 17 & 18, and north to team tracks (public sidings) together with the Jehovah’s Witnesses “Watchtower” printing works.

It is Sunday morning, the docks are idle as dockers have the day off, ships crews have a day in port, ship owners fret, maintenance crews are at work, the lines north and south are closed for track repairs, even the Brooklyn Queens Expressway is quiet. Hard at work are the Fulton Terminal switching (shunting) crews and tug crews, a chance to earn overtime and to catch up on repositioning freight cars and car floats ready for a busy Monday.’ (X2014 News, NMRA (BR) Convention Guide, 2014).

Fulton Turminal - NMRA 2014 36

Fulton Turminal - NMRA 2014 3 Fulton Turminal - NMRA 2014 4

As all the barges are movable this makes the switching operations very interesting and I think gives a really unique twist on a switching layout.

Fulton Turminal - NMRA 2014 12 Fulton Turminal - NMRA 2014 13 Fulton Turminal - NMRA 2014 6 Fulton Turminal - NMRA 2014 7 One of Andrew’s passions is model ship building and that really shows in his beautiful vessels.  He said he built a lot of the boats and ships before he built the layout.

Fulton Turminal - NMRA 2014 1 Fulton Turminal - NMRA 2014 9

Fulton Turminal - NMRA 2014 15

Fulton Turminal - NMRA 2014 16

Fulton Turminal - NMRA 2014 8

Fulton Turminal - NMRA 2014 17

At the head of the layout, where the line would connnect to the rest of the network, is a city freeway which makes a great vew block, a biker and a Greyhound bus are heading off on a road trip

Fulton Turminal - NMRA 2014 10 Fulton Turminal - NMRA 2014 11  
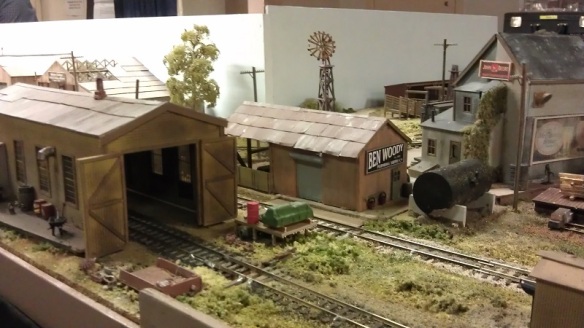
The BEDT has a small engine house near the throat of the yard.

Fulton Turminal - NMRA 2014 14

An old barge ramp sits in the yard awaiting repair or the scrap man’s torch.

Fulton Turminal - NMRA 2014 18 Fulton Turminal - NMRA 2014 20 Fulton Turminal - NMRA 2014 21 Fulton Turminal - NMRA 2014 22

None of the tracks on the barges need to be powered as no motive power is allowed on them, the heavy locomotives would cause the barges to sink much too low into the water.  Instead a switcher’s truck is used between the locomotive and the stock on the barge as shown below.

Fulton Turminal - NMRA 2014 23

The ships are also all movable and on the Sunday morning the large ship had moved to the other side of the dock.  This is a really nice touch as it makes the layout different every time.Fulton Turminal - NMRA 2014 24 Fulton Turminal - NMRA 2014 25 Fulton Turminal - NMRA 2014 26 Fulton Turminal - NMRA 2014 27 Fulton Turminal - NMRA 2014 29

The BEDT have several switches that were working the harbour.

Fulton Turminal - NMRA 2014 30

Fulton Turminal - NMRA 2014 37

A piling rig waits in the dock for its next job.

Fulton Turminal - NMRA 2014 31

The tug boats position the barges near to the loading ramps, then the dock crew attached ropes that pull the barges into the dock. You can see Andrew’s models of the rope winches and a docker in the photo below, there is a winch for each side of the barge.

Fulton Turminal - NMRA 2014 33

Each side of the layout is framed with the warehouses which are built on the docks, some of the doors are open so when you peer through the holes on the layout facia, you are looking out of the warehouse doors.

Fulton Turminal - NMRA 2014 34 Fulton Turminal - NMRA 2014 38 Fulton Turminal - NMRA 2014 39

This layout was great to watch and gave an interesting new element to the fun of switching trains.

The final layout at this year’s convention is an Hon3 Layout, Sawpit Creek built by Neil Lancaster.

Sawpit Creek - NMRA 2014 4

This layout is simply stunning, the attention to detail is wonderful, there was not an area that did not have the same level of work and skill given to it to make the overall realism come true. Here is what Neil has to say.

‘This is my first venture into Hon3. Until recently, modellers had to scratch build most of their needs but the introduction of ready to run locomotives and rolling stock, together with available turnouts and track, has made the scale increasingly popular.

My layout, Saw Pit Creek started life as an 8ft x 6ft test track for the superb locomotives and stock which had recently become available from Blackstone Models. It was soon extended along the left hand frontage to add operational variety and more space for my scratch built buildings and scenery which is of particular interest to me.

I have recently added a further 4ft module along the right hand frontage which is being exhibited for the first time at this Convention.

The layout depicts my interpretation of the Denver & Rio Grande narrow gauge in the late fifties. It is based on nowhere in particular. Saw Pit Creek is ‘my place’ USA. It’s certainly not for the narrow gauge purists!

As mentioned, all locomotives and stock are manufactured by Blackstone (a division of Soundtrax). Not surprisingly therefore all locomotives are equipped with sound. DCC operation is via a Digitrax radio control system. Track work is by Micro engineering and Peco.’

Sawpit Creek - NMRA 2014 5

Sawpit Creek - NMRA 2014 10

Sawpit Creek - NMRA 2014 19

Sawpit Creek - NMRA 2014 22

Neil’s passion, apart from attention to detail, is structures and it really shows in this layout. All the buildings look like they have been there for ages and the railroad has grown up around them.

The boiler works are busy with their current workload and the detail goes all the way to the back where you can see a small steam boiler freshly painted.

Sawpit Creek - NMRA 2014 8

The crew from the local farm supplies shop are servicing a tractor.

Sawpit Creek - NMRA 2014 9 At the junk yard they have just about everything, even a bath tub!

Sawpit Creek - NMRA 2014 11

Even the sides of the layout have been used to add detail to the scene.

Sawpit Creek - NMRA 2014 13

Every building had detail all through, this fabricator’s shop has a welder working at the back.

Sawpit Creek - NMRA 2014 12 
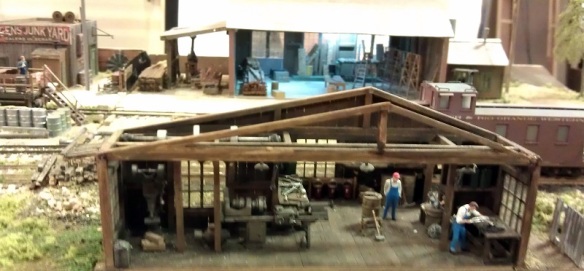
This machine shop has all the workings and machinery visible, along with all the tools and even a cat sat on the barrel, useful for keeping the rats away.

Sawpit Creek - NMRA 2014 14

If you look at the back wall of the workshop you can see the fire buckets hanging on the wall.

Sawpit Creek - NMRA 2014 15 Sawpit Creek - NMRA 2014 16

The building to the right of the engine house spans the joint in the base boards, but as Neil wanted to position the building there, it splits apart when the layout is dissembled. It’s not square to the cut either which was impressive.

Sawpit Creek - NMRA 2014 17 Sawpit Creek - NMRA 2014 18

Sawpit Creek - NMRA 2014 26

As Neil said the locomotives are made by Blackstone and are beautiful to watch. Here is a 2-8-0 in D&RG Bumbel Bee yellow.

Sawpit Creek - NMRA 2014 20

Sawpit Creek - NMRA 2014 23

And a train of matching coaches.

Sawpit Creek - NMRA 2014 27

Here it is running through the layout.

The freight locomotive are not so clean, they have been fantastically weathered by Steve Knight of Model Railway Solutions in Poole.

Sawpit Creek - NMRA 2014 1 Sawpit Creek - NMRA 2014 2 Sawpit Creek - NMRA 2014 3 Sawpit Creek - NMRA 2014 6 Sawpit Creek - NMRA 2014 21 Here is a video of a freight working its way through the layout.
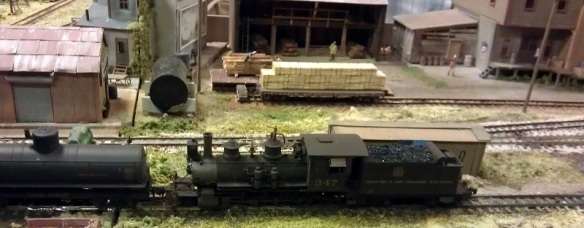
Sawpit Creek - NMRA 2014 28 Sawpit Creek - NMRA 2014 30

This layout kept me occupied for a long time as there was so much to see and I reckon I didn’t see it all.

And that is it for the layouts at this year’s NMRA (BR) convention, a big thanks to everybody who brought layouts and came to see the show. Next year the convention is at Derby and I will be there along with my club, the Gosport American Model Railroad Group and our N Scale club layout, Solent Summit.

Next week I will be getting back to posting about some of my new products I have been drawing and developing over the last month.