
In last week’s post I shared with you my designs for some 3D printed OO Gauge fixed link couplings specifically for coaches; you can find the post here. This week I’ll be showing you the actual couplings and some images of them in use.
The initial test prints were done in Shapeways White Strong & Flexible material. I chose this because it’s the cheapest material they do. I’ve also used the Strong & Flexible material, instead of my normally prefered Frosted Detail plastics, as these couplings don’t need any fine detail. As they are hidden they simply need to function. In the image below you can see a set of the white couplings in a pair Bachmann Mark 1 coaches. This particular set turned out to be too short as the corridor connections meet before the pegs could locate into their holes.

But the good news is I test printed several different sizes in order to see what worked and I was able to come up with a set of 5 which covered all bases.
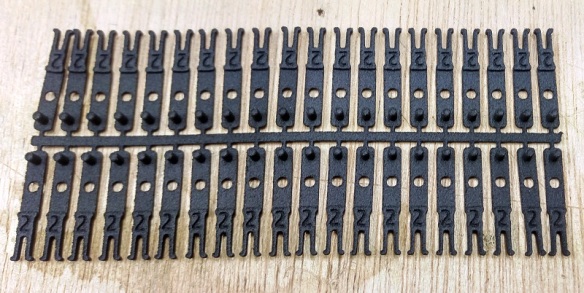
Below is a set of 40 Type 2 or length 2 couplings. These are the second shortest type. This time I 3D printed them in the Black Strong & Flexible material which will also be used for the final couplings.
These couplings were originally developed for use on the beautiful new model of Bournemouth West. So a good set of coaches to test the new couplings on is Hornby’s British Railways Somerset & Dorset Maunsell coaches, as they would have been common in this station.
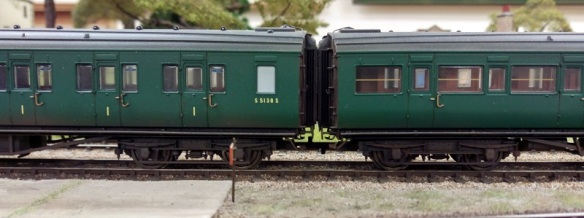
In this stock photo below you can see the big gap between the coaches using the standard OO couplings.

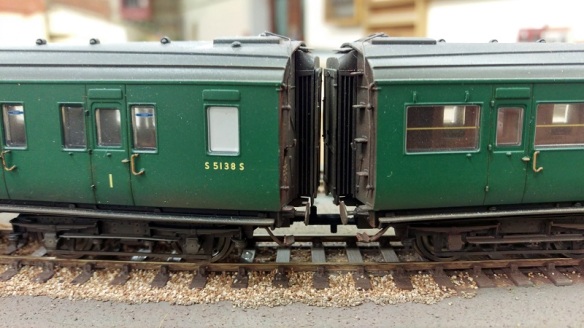
However with my coupling fitted, the corridor connections are millimeters apart, as you can see in the images below. This gives the impression of a joined connection.

And as these coaches are fitted with the NEM cam system, this causes the NEM socket to swing and move out on corners; the gap increases as the coaches travel around corners. This prevents the corridor connections and buffers from locking up and derailing the coaches.
The overall effect is very good. Also they won’t come uncoupled but can simply be lifted off the layout when done.

These couplings also work well for the Bachmann Mk’1 coaches.

This older set wasn’t fitted with the cam system but my couplings still worked well around the corners, as the NEM socket swivels.

The Hornby Pullman coaches have their NEM couplings set much further back than the others I’ve tested so far and required a longer coupling. The ones used below are still a bit too long but this has been corrected in my computer model.
 Here are some videos of the test couplings in use with a push-pull service reversing around the corner and heading into Bournemouth West Station.
And again with a section of the Bournemouth Belle coming around the corner and heading into Bournemouth West Station.
And finally with the Pines Express; some of these coaches have Kadee couplings but mine have been used on the rest.
Just of interest, the layout Bournemouth West will be making its debut appearance at the Swindon Railway Festival, held at the Swindon Steam Museum on the 9th and 10th September 2017.
Next week I plan to share the couplings with you in their finished condition and also let you know where you can get them.


 Modeling this can done and, with newer models now having the NEM sockets, different couplings can easily be exchanged. A plug-in Kadee knuckle coupler is available for the NEM socket and it’s a good way to connect coaches. However as with the freight stock, if you have rakes of coaches which you want to stay permanently coupled, adding Kadee couplers comes with the risk of separation plus the expense of adding one to each end of every coach. Bachmann make a coupling designed to be a fixed link between coaches which looks like vacuum pipes hanging down. Again this is a good idea but what if you run trains at exhibitions or like to swap the trains on your layout? Picking up 5 to 10 coaches all linked together is a bit tricky.

 They can be used in pairs with the same number or mixed together to give any required length.

You must be logged in to post a comment.